
How to Make a Dress Part 4: Stay-stitching, Interfacing and Hand Overcasting
The gas-man came on Thursday and put the heating back on. Apparently the smell was due to our flu; flues are easily affected by the wind and that was what was sending the dreadful smell into room. It wasn't gas; we don't know what it was, it just smelled awful. Anyway, back to the dress...
Stay-stitching

If you are using a sheer fabric, you should do this over tissue paper like pattern paper, or over stabilizer so that your sewing machine doesn't eat your fabric. If you are sewing a loose weave fabric, you should stay-stitch all the edges, even the straight ones so that they still measure the same length. This is especially important if you are sewing a plaid loose weave fabric and want the plaid to match up. You don't need to stay-stitch the pieces that are going to have fusible interfacing; that will hold them in shape.
Interfacing
Having cut out all your pieces from fabric and done the stay-stitching, now you can cut and apply the interfacing. Interfacing, for those of you who don't know, is a kind of fabric sold in the notions department, that stabilises fabric and makes it stiffer. There are many different kinds, which come to your attention especially when you venture into tailoring, but the kinds that you will use most often in dressmaking are fusible and sew-in. I will show you how to use both when we cross those bridges.
The peices that need interfacing are:
- the upper collar or top collar (same thing)
- the tops of the pockets (to help them keep their shape and not sag)
- the pocket flaps
- the inset at the neckline of this style (a sailor dress)
- the facings (just neck-facings in this style because we have sleeves)
- the zip area
- the hems (optional)
- the "knot" (optional)
It looks like a lot, but they are mostly small things. You use the same pattern piece as you used for the fabric, and on the same grainline. You might think that interfacing doesn't have a grainline, but even the fusible and sew-in kinds that look like tumble dryer sheets stretch more in one direction than in the other. The grain to use is the non-stretch directions.
When you want to know if a piece ought to be interfaced, think if it needs to maintain its shape like collars and plackets do. If you want a crisp appearance, you can interfacing the whole section; if not, you can interface the facing. The crispness is perhaps more noticeable with fusible interfacing.
NB: It is a good idea to preshrink your interfacing by soaking it in hot water for about 20 minutes or until the water cools. You should do the same with twill tape or cotton tape as well. Otherwise, tape could shrink and garment won't (assuming you have preshrunk the fabric) making it uncomfortable and tight.
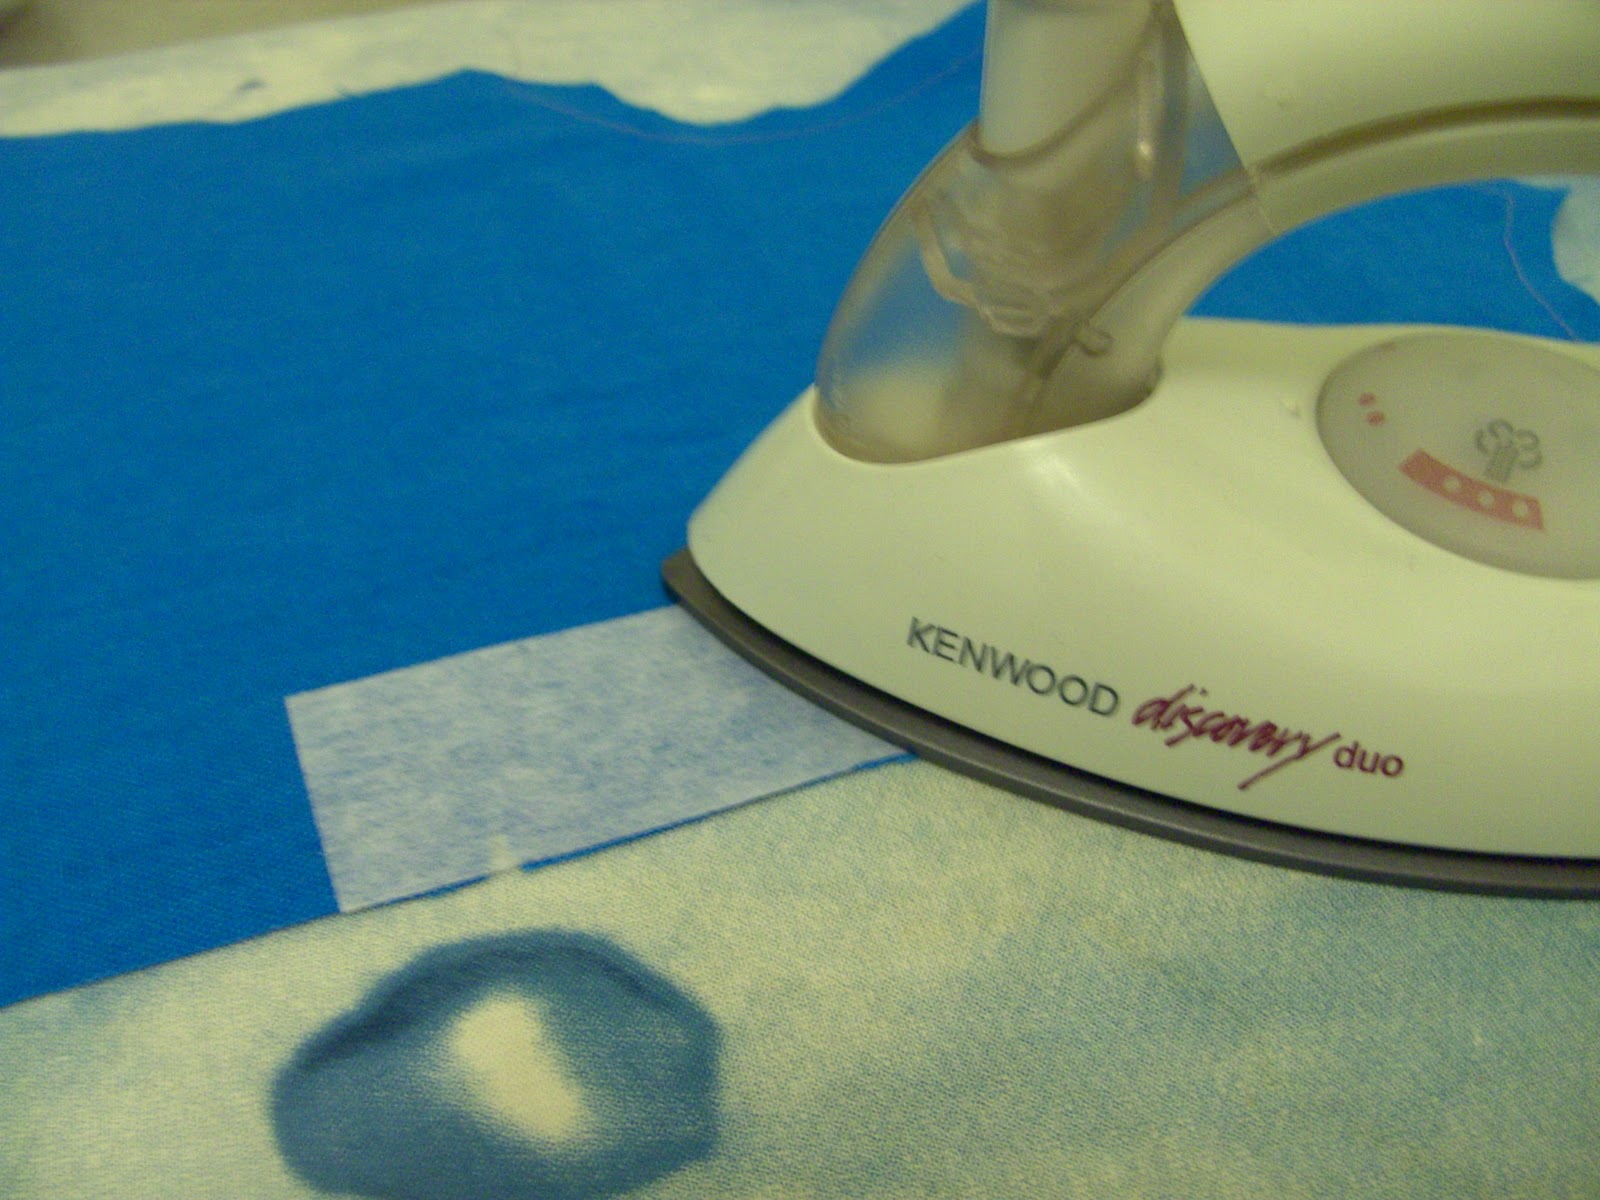
When you have cut the interfacing out, put it on the WS of it's fabric piece, with the shiny side against the fabric. Then press in place using the instructions on your packet. You may need to press more than once and use a press cloth, especially if your material is sensitive to the iron.
It is hard to say what heat to use. I would say that you ought to start with the temperature that is right for the fabric, and if that doesn't make it fuse, turn it up and use a press cloth.
How to Apply Sew-in Interfacing
If you are using sew-in interfacing, it doesn't matter which way up you have it because there isn't a RS and a WS like on fusible. Just have it match the shape and baste it around the edge inside the seam allowance. The interfacing gets sewn in permanently when the garment seam is sewn. Then you can trim the interfacing's seam allowance to about half to reduce bulk. If it is at a curved edge, you just clip or notch it as you do the garment fabric.
Why use interfacing?
Interfacing helps your garment keep it's shape. It can also change the drape of the fabric and it prevents facings from shifting. It can also give a neater finish to plackets, zips, pocket top-edges, hems, etc.
What about different fabrics?
Silk fabrics, particularly the drapier ones, ought to be interfaced with silk organza because it gives a better finish on such fabrics. Muslin is also a kind of interfacing, but it shrinks to about half it's original size so you must preshrink it. (I know because I made some muslin laundry bags and didn't preshrink it).
I have only used Hemline Sew-in and Fusible interfacings so far, but I expect to learn more about interfacing from Couture Sewing Techniques by Claire Shaeffer which has just arrived as I am writing this post (yippee!)
When you have applied the Interfacing to a Facing...
It is time to neaten the outer edge of the facing, i.e. the edge that will not be part of a seam. You can
How to Hand Overcast (AKA Oversew)
When sewing machines were almost universally straight-stitch machines sewers had to neaten edges in other ways. They could bind the edges, pink them, clean-finish, use ribbon to cover the edge and hem it down invisibly to the garment, or use a different kind of seam such as a French seam or a felled seam. One very common way to neaten edges and a way that is used in couture sewing is to overcast or oversew the edges. It's basically half a zigzag.
Some people might use silk thread, but Susan Khalje says to use polyester thread. As I don't have any silk thread, I use polyester and it works fine.

It is time to neaten the outer edge of the facing, i.e. the edge that will not be part of a seam. You can
- overlock/serge it if you have an overlocker/serger
- zigzag it
- pink it if the fabric does not fray
- bind it (this is seldom done, because it can add bulk)
- hand overcast it as I did.
How to Hand Overcast (AKA Oversew)
When sewing machines were almost universally straight-stitch machines sewers had to neaten edges in other ways. They could bind the edges, pink them, clean-finish, use ribbon to cover the edge and hem it down invisibly to the garment, or use a different kind of seam such as a French seam or a felled seam. One very common way to neaten edges and a way that is used in couture sewing is to overcast or oversew the edges. It's basically half a zigzag.
Some people might use silk thread, but Susan Khalje says to use polyester thread. As I don't have any silk thread, I use polyester and it works fine.

- First, you sew a few backstitches on the spot to secure your thread. You can knot it instead if you prefer, but I don't want the knot to come through the weave of the fabric.
- Next take the needle over the edge and to the right a little. Bring it through as in the photo above.
- Holding the thread at a diagonal with your thumb, repeat step two.
- Keep your stitches as neat and even as you can and keep going all the way to the end.
This stitch can also be used decoratively on fabrics that don't fray, or on hemmed edges. Take a look at cowboy clothes and see. : )
NB. If you are left-handed, just "mirror" the instructions. You can also copy the image to paint and flip horizontally if you wish. (Only for your personal use, otherwise please ask first).
I think that's enough for one post. Next week I think we'll make the smaller pieces (or at least some of them such as the pockets, sleeves, inset and bow. We won't apply them until the dress part is sewn.
I hope all that helps!
Until next time, happy sewing!
Sabrina Wharton-Brown
The Sewing Corner Haberdashery, Hornsea, East Yorkshire, HU18 1AP, UK
Labels: How to Make a Dress, sewing
posted by SWB @ October 17, 2011
3 Comments
![]()
![]()

3 Comments:
Thanks so much,I couldn't find any help on interfacing anywhrere.
IT HELPS ME, BUT DO YOU CLIP THE SEAMS AROUND THE NECK AFTER YOU SEWED THE ENTERFACING ON, AND THE MATERIAL FRAYS
Yes, you have to clip the seam allowances after sewing the seam otherwise the neckline won't sit nicely. For security, you could use fusible interfacing instead of sew-in, and stitch a second line of stitching right next to the first one, inside the seam allowance.
Post a Comment
Subscribe to Post Comments [Atom]
<< Home